
How to Sand a Door Like a Pro | Steps to Follow for Perfect Panting
TheToolGeeks.com is a participant in the Amazon Services LLC Associates Program and other affiliate advertising programs. We may earn from qualifying purchases. (Learn More).
Sanding a door might seem straightforward, but achieving a smooth and professional finish requires proper technique and attention to detail. Whether you’re refinishing a weather-beaten wooden door or preparing a door for a fresh coat of paint, properly sanding doors can transform the look of your home.
To sand a door properly, gather all the required equipment and materials. After that, remove the door and clear the surface area. Now, start sanding with the grain using even pressure. Target problem spots and clean thoroughly between coats. Take care of safety, clean well between grits, and be patient for flawless results.
In this comprehensive DIY guide, we’ll explain six significant DIY steps to sanding a door like a pro. We will also discover some advice and practical tips from woodworking experts for getting a professional like sanding.
Jump To Page Contents:
How to Sand a Door Like a Pro: 6 Steps to Follow
To sand a door like a pro and achieve perfect painting results, start by gathering your tools and materials and then follow these steps:
- Gather your tools and materials
- Prepare the door and workspace
- Maintain proper sanding techniques
- Carefully address problem areas
- Clean up and finish
- Final touches and maintenance
Step 1: Gather Your Tools and Materials
Gather all necessary tools and materials before beginning the sanding process to ensure a smooth and efficient door sanding experience. You’ll need:
- Sandpaper: Choose a variety of grits (60 to 220 grits), including coarse, medium, and fine, to tackle different surfaces and achieve the desired smoothness.
- Dust masks and eye protection: Protect yourself from airborne wooden and paint particles and debris generated during sanding.
- Sanding blocks or sponges: These are required for tackling detailed areas and ensuring even sanding.
- Paint scraper: Remove any existing paint or varnish from the door surface.
Step 2: Prepare the Door and Workspace
Prepare for sanding by removing the door from its frame and placing it on a stable work surface. This will create an optimal workspace for the upcoming sanding process. Clear the area around the door to prevent dust from settling on door surfaces.
To protect the floor, consider using a drop cloth or plastic sheeting. Having a clean and clutter-free workspace will make the sanding process more efficient. This preparation step is crucial to ensure you have enough space to move around the door and access all areas that need sanding.
Step 3: Maintain Proper Sanding Techniques
When sanding a door, use proper techniques to ensure a flawless finish. Start by sanding the flat areas of the door, always following the wood grain to prevent scratches. Use coarse-grit sandpaper to eliminate rough patches or imperfections. Gradually transition to finer grits for a smoother surface.
When working on detailed or curved areas, utilize sanding blocks or sponges for precision and uniformity. Remember to apply even pressure while sanding and avoid pressing too hard, which could result in uneven surfaces.
Step 4: Carefully Address Problem Areas
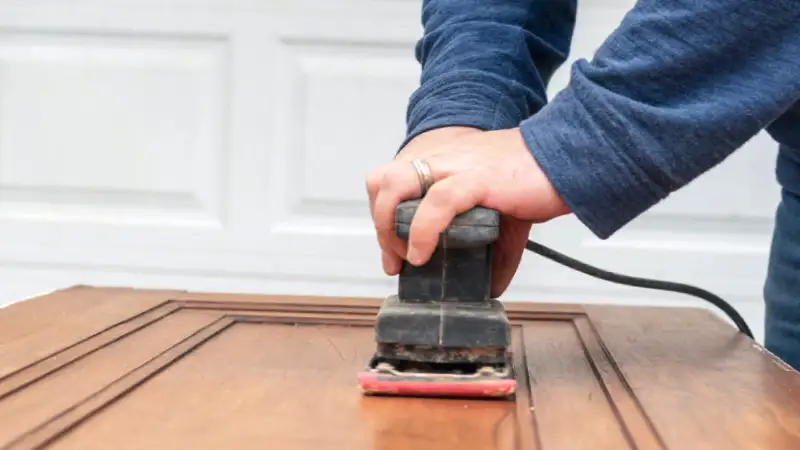
If you encounter sticking doors with stubborn paint or varnish while sanding, use a hand sander or sanding blocks to tackle these problem areas and ensure a smooth surface for painting.
A hand sander can quickly tackle these problematic spots in under a minute, or you can opt for sanding blocks or sandpaper for targeted sanding. Once you’ve smoothed out these areas, consider applying a fresh coat of paint to prevent future issues.
Step 5: Clean Up and Finish
To achieve a professional finish, thoroughly clean up all dust and debris from the surface before proceeding to paint or varnish. After sanding, wipe down the door with a damp or tack cloth to ensure a smooth and dust-free canvas for painting. Remove any particles that could mar the final result.
When applying primer or paint, adhere to the manufacturer’s instructions regarding drying time and application techniques. Following these guidelines will help you achieve a flawless finish.
For optimal smoothness, consider lightly sanding between coats. This extra step can make a significant difference in the overall appearance of your door.
Step 6: Final Touches and Maintenance
After sanding the door, carefully reinstall the door hardware, following the instructions, to ensure proper alignment and functionality. Consider applying a protective finish or sealant to prolong the lifespan of your freshly sanded door and keep it looking its best for years to come.
With these final touches and maintenance steps, your door will continue to enhance your space with its newfound charm.
Effective Strategies for Sanding Wood Doors Like a Professional
When sanding wood doors, follow these tips for getting professional results:
1. Choose the Right Sandpaper Grit
To achieve a professional finish when sanding wood doors, the key starting point is selecting the appropriate sandpaper grit. To address rough areas or old paint effectively, begin with coarse-grit sandpaper, typically around 60-100 grit. This grit will help you remove imperfections and level the surface.
As you progress, switch to finer grits ranging from 120 to 220 to achieve a smoother finish. Remember, the higher the grit number, the finer the sandpaper. Adjust the grit based on the condition of your door; using too fine grit on rough areas may prolong the sanding process.
2. Follow the Grain of the Wood
To continue achieving a professional finish while sanding wood doors, adhere to the natural grain pattern as you work on the door’s surface. Sanding in the direction of the grain is crucial to prevent scratches and maintain the integrity of the wood.
By following the natural lines of the grain, you ensure a smoother and more consistent result. Sanding against the grain can lead to uneven surfaces and visible imperfections in the finish.
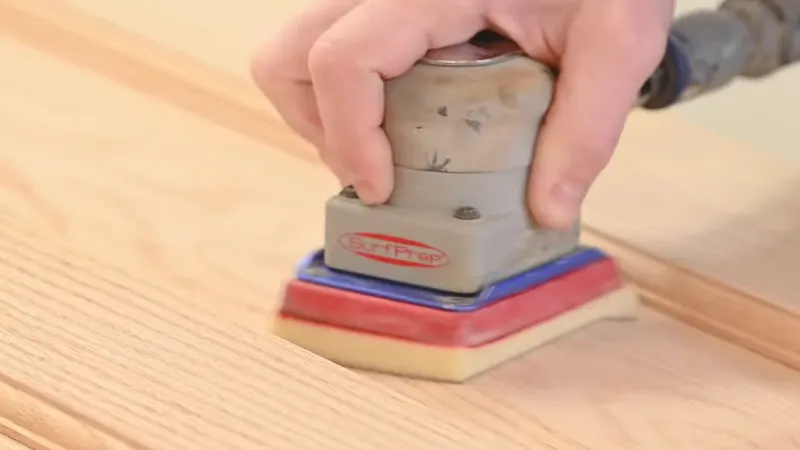
3. Use Sanding Blocks or Sponges for Detail Work
Looking for an effective way to tackle detailed areas on your wood door like a pro? When faced with intricate designs or hard-to-reach spots, sanding blocks or sponges is the way to go. These tools offer superior control and accessibility, ensuring precise and uniform sanding results.
Their ability to navigate tight spaces that ordinary sandpaper can’t reach makes them invaluable for detailed work. Sanding blocks and sponges also help evenly distribute pressure, minimizing the chances of over-sanding or creating uneven surfaces.
4. Employ Wet Sanding for a Smoother Finish
When tackling detailed areas on the door, consider employing wet sanding for a smoother finish. This technique involves using water or a lubricant to dampen the sandpaper and reduce friction.
Wet sanding is particularly effective for achieving a glass-like surface on wood doors and minimizing dust during the sanding process. To ensure the best results, use fine-grit sandpaper and maintain a gentle touch when wet sanding to avoid damaging the wood fibers.
This method helps achieve a professional finish and makes the sanding process more efficient and less messy. Remember to keep the sandpaper damp throughout the process to optimize the smoothing effect on your wood door.
5. Address Problem Areas Carefully
To effectively sand doors like a professional, carefully address any problem areas that may arise during the process. If you encounter sticking doors or areas with stubborn paint or varnish, take your time to address them adequately.
Utilize a hand sander or sanding block to gently sand down these spots, ensuring not to remove too much material. Another option is to use a paint scraper or chemical stripper to eliminate old finishes before sanding.
6. Wear Proper Safety Gear
Wear a dust mask and safety goggles to safeguard yourself from airborne particles and debris while sanding wood doors like a professional. Sanding produces fine dust that can irritate your respiratory system and cause eye discomfort, making protective gear essential.
Additionally, consider wearing gloves to shield your hands from splinters and rough surfaces. By donning the appropriate safety gear, you can protect yourself from potential health hazards and create a safer working environment.
Prioritizing safety ensures a smoother sanding process and reduces the risk of injuries or discomfort. Safety should always be a top priority when working with tools and materials to achieve professional results.
7. Clean Up Thoroughly Between Grits
Between each sandpaper grit, ensure thorough door surface cleaning to eliminate dust or debris, maintaining a pristine canvas for subsequent sanding stages. Use a tack cloth or damp cloth to wipe down the door, ensuring all particles are removed. Pay close attention to corners and crevices where dust can accumulate.
Cleaning between grits prevents residue buildup, leading to a smoother finish. Be meticulous in this step to achieve professional results. A clean surface also allows you to inspect the wood for any imperfections requiring additional sanding.
8. Take Your Time and Be Patient
Slowly and methodically sanding your wood doors will help you achieve a professional finish with precision and care. Taking your time during this process ensures that each section is sanded thoroughly and evenly. Focus on problem areas, such as corners or edges, giving them the extra attention they need.
Rushing through sanding can lead to uneven finishes and imperfections that are challenging to fix later. Remember to take breaks when necessary to maintain your focus and energy levels. Patience is critical to achieving a flawless result, so resist the urge to rush through the task.
Your attention to detail and dedication to a meticulous sanding process will pay off with a beautifully finished wood door.
Common mistakes DIYers make while sanding a Door
When sanding a door, be cautious of using the wrong grit sandpaper, as it can damage the wood.
1. Using Wrong Grit Sandpaper
Using the right grit sandpaper can result in efficient sanding and potential damage to the door’s surface. When sanding a door, selecting the correct grit is crucial. If you begin with too coarse sandpaper, such as 40 or 60 grit, it can remove too much material too quickly, leading to deep scratches and uneven surfaces.
On the other hand, using a grit that’s too fine at first, like 220 or higher, may not effectively remove old finishes or smooth out imperfections. For most door sanding projects, starting with 80 or 100-grit sandpaper is a good balance between removing old finishes and preparing the surface for refinishing.
2. Not Sanding Enough
Thoroughly sand the entire door surface to avoid missing crucial spots and ensure a smooth finish. Neglecting certain areas can lead to an uneven appearance once you apply the paint or finish. Start by sanding the edges and corners, which are often overlooked but are essential for a polished look.
Pay special attention to any existing paint or varnish, as these areas may require extra sanding to remove altogether. Use a sanding block or sandpaper to reach recessed panels or intricate designs on the door.
3. Not Sanding Diagonally
Consider incorporating diagonal sanding strokes into your technique for a more even and thorough sanding job on your door. Sanding in only one direction risks missing spots and leaving uneven surfaces. Diagonal sanding helps ensure you reach all areas of the door, especially the corners and edges that are easy to overlook.
Start by sanding diagonally in one direction and then switch to the opposite angle to cross-hatch the surface effectively. This method helps to remove imperfections more efficiently and results in a smoother finish.
Remember to apply consistent pressure and keep the sandpaper flat against the door to avoid creating uneven surfaces. You’ll achieve a professional-looking result by incorporating diagonal sanding into your process.
4. Paying too Much Attention to the Edges
Avoid fixating solely on the edges when sanding a door to prevent uneven surfaces and missing spots. While edges are important, focusing too much on them can lead to an imbalanced finish. Make sure to sand the entire surface uniformly, including the center of the door panels and edges.
Use smooth, consistent strokes to maintain an even texture throughout. Neglecting the central areas may result in noticeable variations in the smoothness of the door. Remember to periodically check the entire surface for any rough patches or imperfections.
5. Not Replacing the Sandpaper With New One
Changing the sandpaper on your orbital sander is crucial to maintaining an effective sanding process when working on a door. Using worn-out sandpaper can lead to inefficient sanding, leaving rough patches and prolonging the overall sanding time.
Old sandpaper may become clogged with dust and debris, reducing its abrasive properties and making it less effective at smoothing the door’s surface. To ensure optimal results, replace the sandpaper regularly, especially when you notice a decreased sanding efficiency.
How long does it take to fully sand a door?
A door can be sanded in as little as 30 minutes with an electric drum sander, compared to 1 or 2 hours with hand sanding.
An electric sander’s efficiency is due to its ability to rotate up to 12,000 times per minute, allowing you to work through the project swiftly. When using hand sanding, the time required increases significantly as it involves manual labor and precision.
Factors such as the condition of the door, the type of wood, and the level of sanding needed can also influence the time taken to complete the task. However, overall, opting for an electric drum sander can save you a substantial amount of time and effort.
What kind of electric sander do I need to sand a door?
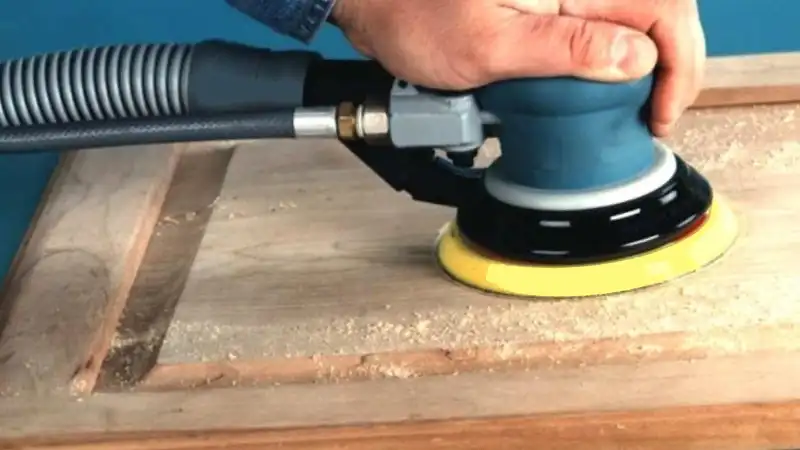
Consider investing in a quality random orbital sander with a dust collector if you plan to sand multiple doors or engage in frequent DIY projects
A random orbital sander is versatile, making it suitable for various tasks beyond just sanding doors. The random orbital motion ensures a swirl-free finish, which is essential for a professional look.
A dust collector’s added benefit is that it helps keep your work area clean and minimizes the need for extensive cleanup afterward. Look for a random orbital sander with variable speed settings, which allow you to adjust the sanding speed based on the task.
Additionally, choosing a model with ergonomic features such as a comfortable grip and vibration reduction can make extended sanding sessions more manageable. When selecting sandpaper for your sander, opt for a hook-and-loop (Velcro) attachment for easy changes during the sanding process.
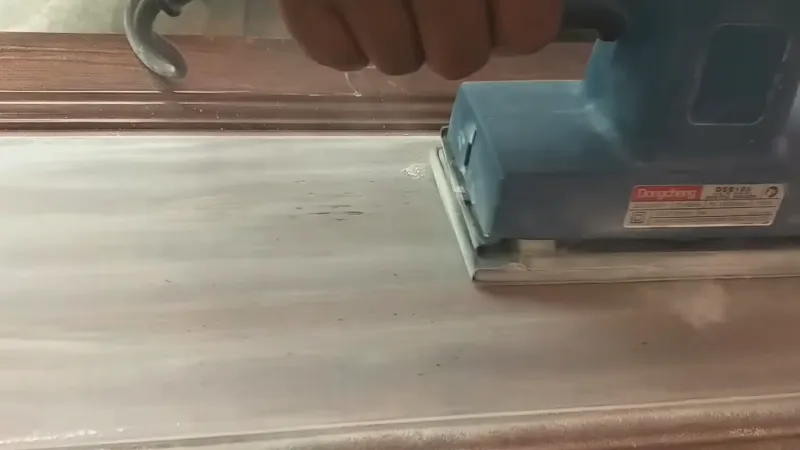
Can I sand a door with a hand sander?
To send a door effectively using a hand sander, ensure you have the appropriate tools and follow a systematic approach for the best results. Hand sanders like the ALLWAY UHS or WAL-BOARD tool hand sander can be used to sand a door, especially if you’re working on a small portion or need more precision.
When using a hand sander, starting with coarse-grit sandpaper is essential to effectively remove any old paint or finishes. Move the sander back and forth toward the wood grain, applying even pressure. Once you have removed the desired material, switch to finer-grit sandpaper to smooth the door surface.
Remember to wear a mask and safety goggles to protect yourself from dust and debris. With the right technique and tools, sanding a door with a hand sander can yield professional-looking results.
Is it better to sand a door by hand or with a sander?
When deciding between hand sanding and utilizing a power sander to sand a door, consider the size and intricacy of the project to determine the most suitable method for efficient and effective results.
Power sanders are great for covering large areas quickly and evenly, saving you time and effort. They work well on flat surfaces and can handle rough materials effectively.
However, hand sanding may be better for smaller projects involving intricate details or delicate materials. Hand sanding allows for more control and precision, especially in hard-to-reach areas or curved surfaces. It’s also gentler on delicate wood or finishes, reducing the risk of over-sanding.
In addition, hand sanding gives you a tactile feel for the surface, allowing you to detect imperfections more easily. Ultimately, deciding between hand sanding and using a power sander depends on your project’s specific requirements.
Should I push down when sanding?
If you wonder whether to apply pressure when sanding, remember this: let the sander move in the direction of the grain, as its natural motion, without the need to push down.
Working with the grain is crucial when sanding a door to avoid damaging the surface. Allowing the sander to glide smoothly over the wood ensures an even and consistent finish.
Pushing down on the sander can lead to over-sanding in certain spots, creating an uneven surface. The weight of the sander and your arm is sufficient to provide the pressure for effective sanding. Trust the tool to do its job and focus on guiding it along the grain for optimal results.
How do I sand a door that is where humidity is causing it to stick?
If your wood door is sticking due to humidity, sanding the problematic areas with a hand sander or sanding block can help alleviate the issue. Start by identifying the places where the door is sticking against the frame.
These may be visible as areas of increased friction or where paint or varnish has become damaged due to rubbing. Be sure to sand evenly and frequently test the door’s movement to achieve the desired fit.
Use a hand sander or sanding block to sand down the areas where the door is sticking gently. Focus on removing small amounts of material to improve the fit gradually. Be sure to sand evenly across the surface to avoid creating uneven spots.
Can I sand a painted wood door?
Certainly! Sanding a painted wood door involves a specific process to ensure the best results while maintaining safety and minimizing mess. Before starting the sanding process, inspect the painted wood door to identify any areas of concern. Look for places where the paint may be chipping, peeling, or uneven. These areas require more attention during sanding.
Set up your workspace in a well-ventilated area, preferably outdoors or with adequate ventilation. Lay down a drop cloth or plastic sheeting to protect the floor from dust and paint chips. Furthermore, a dust containment system or vacuum attachment should be considered to minimize airborne particles.
Unleash your inner craftsman: Perfect your door-sanding skills
Sanding a door like a pro requires patience, precision, and the right tools and techniques. Following these six major DIY steps, you can transform a worn-out door into a smooth and elegant focal point of your home.
Whether you’re refinishing a wooden door or preparing it for a fresh coat of paint, mastering the art of door sanding will elevate your DIY skills and enhance the overall aesthetic appeal of your living space. So roll up your sleeves, gather your tools, and confidently embark on your door-sanding journey.
Amazon and the Amazon logo are trademarks of Amazon.com, Inc, or its affiliates.

We’re a team of engineers, contractors, technicians, and woodworking experts who use power tools daily and share fact-based information, tips, and recommendations. At thetoolgeeks.com, we debunk myths about power tools and share methods to use them effectively.