

How to Spray Paint in Cold Weather? (11 Steps You Must Follow)
As the seasons change, the weather may start to cool and you may wonder how to spray paint in colder weather or how to continue spray painting jobs into the winter months.
And what about the water-based paint? That's not really an option because it almost always freezes, right?
So how do you spray paint when its freezing outside and what type of paints will work for this application?
How do you keep a surface dry in the cold? What do you use to increase the adhesiveness of the surface? And can you use normal paint in cold weather?
Well, that is exactly why we wrote this article!
Generally, painting in weather temperatures below 50 degrees F (10 degrees C) starts to present challenges. But you can still use your paint sprayer when the weather is cold and get the best painting results.
The quick answers are:
• Ensure the surface is as dry as possible
• Use an adhesion promoter on the surface
• Use cold-temperature paint (contains solvents so it won't freeze)
• Keep your paint sprayer machine warm while spraying
• Warm the paint before spraying
But there’s more to it than just some quick tips. Read on for more details.
[wps_alert type="secondary"]Read More — Best Sprayer for Painting Kitchen Cabinets[/wps_alert]
Can You Use Normal Paint in Cold Weather?
Yes, you can. Though it is advised to go for paints designed to thrive in extreme conditions, your normal paint will still work well as long as the paint is recommended for the surface by the manufacturer. You just have to take a few extra steps to ensure the surface to be painted is completely dry and then the paint is also kept warm so it doesn’t freeze while you are spray painting.
Normal latex or oil-based paint will take longer to dry in cold conditions because the painted surface will stay wet for a longer period causing the paint to remain damp.

The damp nature of the paint can also cause dirt, debris, and even flying insects to get stuck on the walls all leading to an ugly and poorly painted surface at the end.
Though you can still use normal paint in cold weather conditions after a few modifications, you will be better off with paints that contain a high level of coalescing agents. These agents will improve the curing qualities of the paint allowing it to dry properly without the moisture or air impeding the curing process.
However, if you don’t have such paints available, you can still use your normal paint and end up with a very good and clean job. So how do you do that? Well, keep reading to find out.
[wps_alert type="secondary"]Read More — Best Paint Gun for Beginners[/wps_alert]
What Tools Do You Need to Spray Paint in Cold Weather?
- Hot water
- Buckets
- A pair of gloves
- A pair of safety goggles
- Thick clothes
- A face mask or respiratory mask
- Air blower
- A paint shield
- A paint sprayer
- Buckets of paint. You need to pick a paint that thrives in cold temperatures.
How to Spray Paint in Cold Weather
While painting in cold weather, your priority is the nature of the paint and the surface to be painted. The surface needs to be dry and the paint needs to be in its original form (not frozen), so the bulk of the steps below will be aimed at ensuring both of these to get the best painting results possible.
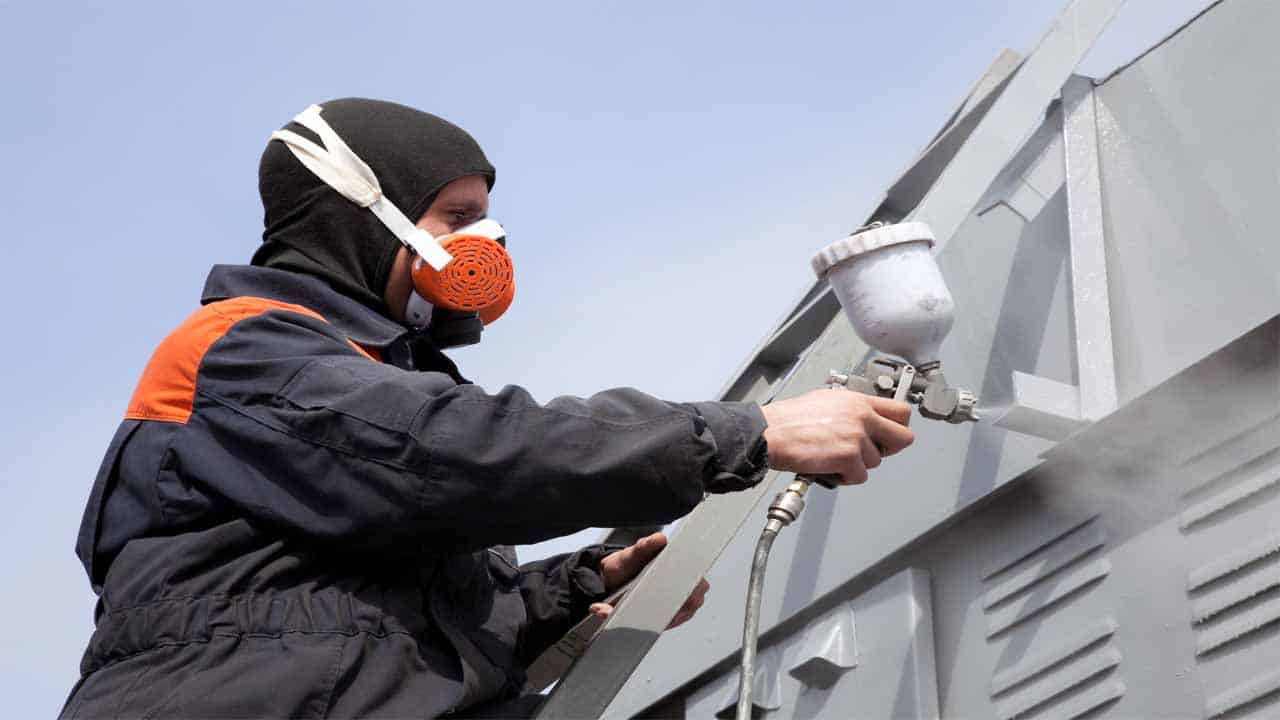
Put on Your Safety Gear
The first thing to do is to ensure your safety. Put on your gloves, face mask, thick clothes, and boots before embarking on any painting task.
Asides from protecting your skin and face from paint stains, the gloves and clothes will also protect you from the cold weather. You don’t want frostbites while painting.
Put Your Paint in a Bowl or Bucket of Hot Water
You should boil some hot water in your kettle and then pour it into a bucket or a bowl that is big enough. After that, you can submerge the paint bucket inside the bowl.
The reason for doing this is so the paint can maintain its original form. Temperature affects paints a lot as it determines if the paint freezes, dries, cracks, or cures properly. Chances are you already had the paint bucket at home and the cold weather could have caused the paint to start freezing.
The warm water will ensure the paint stays liquid without solidifying even when you take it outside to use it. As an extra tip, you might want to replace the water in the bucket with new hot water probably every hour depending on how cold it is where you are.
It is very important for the paint not to clot. If it does, you wouldn’t be able to spray it on the surface and that will result in wasted paint.
[wps_alert type="secondary"]Read More — How to Clean Walls before Painting?[/wps_alert]
Clean the Surface to Be Painted
The surface to be painted needs to be clean meaning free from dirt and moisture. Any moisture left on the surface will lead to a bad paint job later on.
You will need to use a clean cloth to wipe down the surface. As an extra tip, you can shut the doors and windows to the room or area to be painted a day before painting.
This will prevent moisture or breeze from getting into the room. If you are planning on painting the whole house, you can take it one room at a time.
After shutting the windows, clean the walls with a rag to get rid of dirt, dust particles, and moisture. If you are planning on painting the exterior of your house, you might need to get an air blower to blow the walls and surfaces so it dries better.
An air blower, a dehumidifier, or your fireplace can work for interior tasks. The primary motive is to ensure the surface to be painted is warm enough for the paint especially if you are using normal paint.
Remove All Furniture, Objects, and Wall Accessories
Whatever you don’t want the paint to get on, it’s best to move them to another location. If you can’t move them, cover them with plastic sheeting, drop cloth, or nylon.
You should unscrew and remove all wall outlets too. Additionally, use duct tape to cover all wall trims, door frames, window trims, and baseboards.
For the windows, use a tarp or thick board to cover them because the pressure from the paint sprayer can break the glass.
[wps_alert type="secondary"]Read More — Is Painting the Exterior of a House Difficult?[/wps_alert]
Provide an Enclosed Area With Good Ventilation if You Are Painting Outside
Spray painting in the cold is hard enough but when you decide to paint the exterior of your house during the winter season or when the weather is chilly, you are asking for trouble.
It still doesn’t mean it can’t be done. Your best bet is to provide an enclosed space or a bubble for the surface to be painted.
This may require you to get a tent or get creative with a tarp or drop cloth. You can even increase the temperature of the space with a heater to about 70 degrees Fahrenheit if you can. There is usually a lot of wind and breeze when the weather is cold.
The wind can carry debris like sand, dust, sticks, leaves, and all sorts with it. The debris can get stuck inside the paint bucket if you leave it open and even more seriously, the leaves, sticks, and dirt can dash against the painted surface and get stuck. You don’t even want to imagine what that will do to the surface.
If you need to paint an exterior when it’s cold outside, provide a fence-like structure, a tent, or some sort of covering for the painted area while and after you are painting so the painted surface can cure (dry) properly without any hindrance or debris making a mess of things.
Prime the Surface to Be Painted
Ordinarily, you might not need to prime the surface before painting but you need to in cold weather. Priming involves using a compound to prepare the surface to be painted to increase its adhesiveness.
While some paints are advertised as self-priming, a primer is usually sold separately from a paint bucket and it is advised to get one because many of the paints advertised as self-priming are simply just thicker paints.
The primer will improve the durability of the paint by increasing the adhesiveness of the surface to be painted. In simpler terms, the primer is used as an undercoat before paint is applied so the paint can stick to the surface better and dry well too.
Without using a primer in cold weather, you will need many coats of paint. To prime, you can use a roller or a paintbrush to apply the primer on the surface to be painted and let it dry well before you apply the paint.
Inspect Your Equipment
The paint and surface aren’t the only parts the cold weather might affect. Your paint sprayer as well might have been clogged-up by ice or tiny drops of paint from the last paint job that is now frozen.
Inspect the equipment to be used and clean it too before use. Also, you should inspect the paint you have to be sure it can be used on the surface you intend.
Mix the Paint
If you will be using the paint directly from the container, then you don’t need to mix the paint. You can just use a stick or rod to stir the paint to be sure it doesn’t have any lumps that can clog or jam the nozzle of the paint sprayer.
If you need to mix different paints, then you need to do so quickly. After mixing the paint, ensure the container is still placed in a bowl or bucket filled with hot water to ensure the paint doesn’t solidify while using it.
Prime the Paint Sprayer
Priming the paint sprayer means getting it ready to be used. To prime the paint, you need to turn off and unplug the paint sprayer.
Then you should put the suction tube in the paint bucket and the return tube in a waste container. After that, plug in the paint sprayer and switch it to prime.
As soon as you see the paint flowing, turn off the paint sprayer and put the return tube into the paint container with the suction tube. You have successfully primed the paint sprayer. You can now go-ahead to paint.
Start Spraying
After successfully priming the surface to be painted and the paint sprayer, you can go ahead to spray the paint. Before you pull the trigger, you need to pick a good tip for your task.
The tip of the paint sprayer is usually installed at the tip of the sprayer and that’s where the paint comes out from. The tip you pick for your task should fit the task. You can consult the paint sprayer’s manual for recommendations on the right tip to use.
You should also test the spray on a broad section or a disposable board. This will help you discover if the spray is good and smooth enough before going ahead to the main surface.
You should also use a paint shield while painting. If you don’t have one, you can use a board with straight edges. A paint shield will help to increase the accuracy and neatness of your work.
Maintain a distance of about 15 inches from the surface to be painted and leave 8 – 10 inches between the surface and the nozzle of the paint sprayer.
The reason for this is to prevent paint splashing on your body and to allow the nozzle enough distance from the surface so the sprayed paint can cover more sections of the surface. Remember, if you are spraying outside, you need to get a cover or enclosed section while painting and after painting.
Let the Paint Dry
After painting, you usually just leave the surface and allow nature to take its course. However, if you do so during the cold season, nature might not be too friendly.
The weather will most likely be too cold to provide any heat to cure the paint especially if you are painting an exterior surface. This may require you to heat the painted surface regularly by yourself.
Use a Solvent or Paint Thinner to Clean the Equipment Used
After spray painting, it’s better to clean the paint sprayer and other equipment used immediately. The cold weather temperature might make it more difficult to remove the paint from the equipment with just soap and water.
It’s better to use an alcohol-based solvent or a paint thinner to dissolve the paint and then use a soft brush and a rag to clean the sprayer after.
When Is It Too Cold to Paint?
Generally, when the weather temperature is less than 50 degrees Fahrenheit (10 degrees Celsius), it’s usually advised not to embark on any painting task. This is because the air and moisture that comes when the weather is cold wouldn’t allow the paint to dry properly.
At the end of the day, the paint wouldn’t cure (dry) as it should and you will end up with ridges, lines, and folds on the walls. Not to mention that the paint will begin to crack, peel, and fall off. Eventually, you will need to repaint the surface when the weather is more paint-friendly.
While it is advised not to paint whenever the weather is less than 50 degrees Fahrenheit (10 degrees Celsius), some paints still have their specifications.
Oil-based paints for instance can be used in temperatures a bit less than 50 degrees Fahrenheit. Oil-based paints should be used between 45 degrees Fahrenheit to 90 degrees Fahrenheit. Anything less than 45 degrees might not work in favor of the paint.
Also, there are now highly modified paints that can thrive in cold temperatures as low as 35 degrees (1.67 degrees Celsius).
These paint types have been designed with coalescing agents that allow them to cure properly and work well in winter seasons. Some of the said paints dry quicker, are self-priming, and do not even need extra coats of paint.
If you can postpone your painting task till when the weather is warmer, then I’ll advise you to do that but if it’s a paint job you need to be done immediately, then you can follow the steps above to paint in the cold.
As an extra tip, you can go for latex paints that do well in the cold or paints that can be used in weather temperatures lower than 50 degrees Fahrenheit rather than getting the normal paint.
That way, you wouldn’t have to worry much about the adhesiveness or curing process of the paint since it has been designed for the cold.
[wps_alert type="secondary"]Read More — How to Refinish Kitchen Cabinets?[/wps_alert]
Pro Tips to Follow When Spray Painting in the Cold
- Paint when the weather feels warmer than when it’s cold. This may require you to track the temperature with a thermometer. Usually, you should paint at noon during the winter season as the weather is usually colder in the morning and at night.
- Ensure the surface to be painted is not moist and is as clean as possible.
- If you can, you should get a paint designed to be used in cold weather.
- Provide heat to the surface area if you can.
- The temperature of the wall and ceiling is usually colder than the air so you should take that into account too.
Overall, I wouldn’t advise you to paint when the weather is cold. Asides from risking the possibility of a bad paint job, you might also put your health at risk too.
But if you must, then follow the tips above and you’ll be fine. Let me know if you have any questions or comments by leaving them below in the comment section. Have a nice day.

We’re a team of engineers, contractors, technicians, and woodworking experts who use power tools daily and share fact-based information, tips, and recommendations. At thetoolgeeks.com, we debunk myths about power tools and share methods to use them effectively.